Hey everyone, it’s Jake from your go-to vacuum system crew! If you’ve ever dealt with a vacuum line that’s all over the place—pressure dropping when you turn up the chamber, or holding a reading that’s just… off—you know how much that kills your workflow. As a vacuum system supplier, we get called all the time about wonky regulators, and most of the time, it’s just a calibration that’s gone MIA (or never done right in the first place). Today I’m breaking down exactly how to calibrate your vacuum regulator so you can get back to running samples, packaging, or whatever you use your vacuum for, without the headache. Vacuum System

First, let’s keep this real: you don’t need a PhD in vacuum tech to do this. But you do need to take it slow, and have the right stuff on hand. Let’s start with the basics—before you even touch the regulator, prep your space and gear.
The Pre-Calibration Check: Don’t Skip This, I Beg
I’ve seen folks skip this step and end up twisting a regulator till it breaks, so do not skip this. First, turn off your entire vacuum system. Disconnect the main line running to your regulator—you don’t want stray pressure messing things up. Grab a portable vacuum gauge, not the one built into your system, because those can drift too. Make sure that gauge is calibrated itself—we always recommend our techs use a reference gauge that’s NIST-traceable, but if you’re just getting started, a portable digital gauge from a reputable brand works, as long as you trust its readings.
Also, clear your workspace. No random tools, no coffee mugs, no kids (or pets) running around—this takes 15-20 minutes, so don’t rush. If your system has any valves that can trap pressure, open them all so there’s no residual vacuum left in the lines. That’s a common mistake: people calibrate when there’s leftover pressure, and it’s all wrong.
Step 1: Mount the Reference Gauge
Okay, so you’ve got your regulator disconnected, system off, no residual pressure. Now, hook up your reference gauge right to where your regulator usually sits. Make sure the fittings are tight—no leaks here, or your readings will be garbage. If you’re using a compression fitting, don’t over-tighten, that’ll strip the threads. Finger-tight plus a quarter turn is usually enough, but use your best judgment.
Once it’s hooked up, open the isolation valve on your system’s vacuum pump. Let it pull down to a stable low pressure—we’re talking the lowest your system can go, like 100 mTorr or whatever your pump’s max is. Wait 2-3 minutes here. This is to make sure the pressure is totally steady, no fluctuations from the pump kicking on or off. If you see the gauge numbers jumping, check for leaks around the gauge fitting or pump lines. Even a tiny leak will throw everything off, so fix that first before moving on.
Step 2: Access the Regulator Adjustment Screw
Now, most regulators have a little screw that’s covered by a plastic or metal cap. That’s the adjustment point—this is where you’ll tweak the set pressure to match the reference. Before you pry off that cap, take a quick look at your regulator’s manual (if you still have it, if not, just spot it). Some screws are flathead, some are Phillips, some even have hex heads. Don’t use the wrong screwdriver, or you’ll strip the screw and be stuck buying a new regulator part.
Pro tip: mark the current position of the screw with a Sharpie before you touch it. That way, if you mess up, you can just twist it back to where it was instead of starting from zero. I do this every time, saves me so many headaches.
Step 3: Tweak the Pressure to Match Your Target Setpoint
Here’s the fun part. Let’s say your desired setpoint is 500 mTorr. Watch the reference gauge—when it’s holding steady, start twisting the adjustment screw. If you need higher pressure, turn the screw clockwise (most regulators work this way, but double-check your manual—some are counter-clockwise for higher pressure). If you need lower pressure, twist it counter-clockwise. Take it slow, like 1/8 of a turn at a time. Don’t crank it hard, that’ll make the regulator unresponsive for a while.
Wait 30 seconds after each tiny twist to let the pressure stabilize. I’ve seen people twist the screw a whole turn and then get mad that the pressure jumps 200 mTorr—don’t be that person. Once the reference gauge is sitting right at your desired setpoint (and holding steady for 60 seconds), you’re close. Now, double-check it. Open and close a valve on your system to make sure the pressure doesn’t drift. If it stays, great. If it jumps, you might have a tiny leak, or you need to tweak the screw a little more.
Step 4: Test Across the Full Pressure Range (Don’t Just Calibrate One Point)
This is the part most people miss. Calibrating at one pressure is easy, but regulators can drift across their range. If your system needs pressure from 100 mTorr up to 1 Torr, don’t just check 500 mTorr. Go low first: let the system pull down to 100 mTorr, adjust if needed. Then go high: let it pull up to 1 Torr, adjust again. This is important because some regulators work great at low pressure but get wonky at higher ones, and vice versa.
After you hit all the points you use most, check the reference gauge again. If all readings are within 5% of what you want, you’re good. If not, you might need to clean the regulator’s internal filter—sometimes gunk from your system (like oil or dust) builds up and throws off the calibration. If that’s the case, we can hook you up with a filter kit, no hassle.
Step 5: Secure Everything and Test Under Load
Okay, you’ve got the pressure set, now put it back into the system. Reconnect the regulator, screw the adjustment cap back on (so no dust gets in), and close up the valves you opened earlier. Now, run your system like you normally would—if you use a chamber, put whatever you’re processing in there, turn on the pump, and watch the pressure for 10 minutes. This is the real test, because when you’re not just running a test setup, the regulator has to work with the actual load of your process.
If it holds the pressure steady, congrats, you did it! If not, come back and check for leaks, or go through the calibration steps again. Sometimes a regulator just needs a little time to break in if it’s brand new, so don’t panic if the first test is off.
Quick Troubleshooting: The Most Common Calibration Fails
Let’s be real, sometimes it doesn’t go smooth. Here’s what usually goes wrong, and how to fix it:
- Pressure drifts: 9 times out of 10, it’s a leak. Check all fittings, the regulator seat, and the pump connections. Even a tiny leak will make pressure move.
- Regulator won’t hold a set pressure: The internal diaphragm might be dirty or damaged. If cleaning the filter doesn’t work, we can send a replacement diaphragm—super easy to swap, no tech degree needed.
- Pressure is always higher/lower than set: You probably twisted the screw too much too fast. Just go back, slow down, and tweak 1/8 turn at a time next time.
- The reference gauge doesn’t match the system’s built-in gauge: Remember, the built-in gauge is what you were calibrating against, but if the reference is off, that’s on the gauge. If you use our systems, all our gauges are pre-calibrated, so that’s one less thing to worry about.
Why This Matters More Than You Think
As a vacuum system supplier, I can tell you: a calibrated regulator doesn’t just give you accurate pressure readings. It makes your process more consistent. If you’re doing things like vacuum packaging, heat sealing, or lab experiments, a pressure that’s off even by 100 mTorr can ruin your whole batch. I’ve had customers tell me that after calibrating their regulators, their product yield went up by 20%—that’s no small thing. Also, an uncalibrated regulator makes your pump work harder, which shortens its life and costs you more money in the long run.
When to Call Us (We’re Here for You)
Look, we get it—some folks just don’t want to mess with calibration, or they have industrial systems that need annual professional checks. We offer on-site calibration for all our vacuum systems, plus we sell all the gear you need (reference gauges, replacement parts, filter kits) if you want to do it yourself. Whether you need a quick question answered, a part shipped out same day, or a full system calibration, our team is here.
Don’t let a wonky regulator derail your workflow. Calibrating it is easy, cheap, and takes way less time than troubleshooting a bad batch or a broken pump. If you have any questions about your specific system, just reach out—we don’t do fancy sales pitches, we just help you get your vacuum working right.
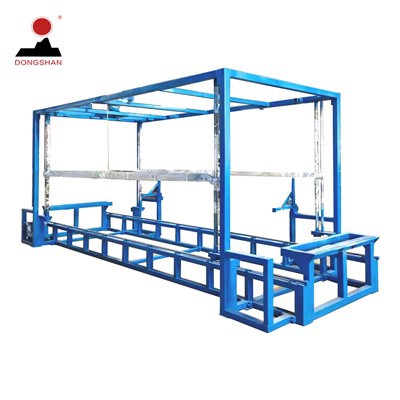
And if you’re in the market for a new vacuum system, we’ve got you covered too—we build reliable, easy-to-maintain systems that come pre-calibrated, so you can get to work faster. No guesswork, no hassle.
EPS Cutting Machine Don’t wait till your next big job to check your regulator. Grab your gauge, your Sharpie, and carve out 20 minutes this week to do this. You’ll thank yourself when your pressure is spot on.
References
- Handbook of Vacuum Technology, 2nd Edition, Carl J. Hoover, Elsevier, 2008
- Vacuum Regulator Calibration Best Practices, American Vacuum Society, 2019
- Practical Guide to Vacuum System Maintenance, SME Vacuum Solutions, 2021
Hangzhou Fuyang Dongshan Plastic Machinery Co., Ltd.
Hangzhou Fuyang Dongshan Plastic Machinery Co., Ltd. is one of the most professional vacuum system manufacturers and suppliers in China, featured by quality products and low price. Please feel free to wholesale advanced vacuum system made in China here and get quotation from our factory. Customized orders are welcome.
Address: 101 Guanting, Baiqian Villige, Luzhu Town, Fuyang District, Hangzhou City, Zhejiang Province, China
E-mail: xu@dong-shan.cn
WebSite: https://www.epseppmachinery.com/
